Monday, November 12, 2012

I'm Gonna Wreck It!!


I loved Wreck It Ralph!  It made me want to spend some time in the lovely land of Sugar Rush.  It also inspired me to make some candy-concocted cupcakes!   

First I mixed 2 cans of frosting into pastel colors!  I made mint green from fluffy white, and pink from cream cheese.  Yum!


I'd gone to Fuzziwigs and picked out some candy that reminded me of Ralph.  I got some bricks (!! What! candy bricks exist? Could anything be more perfect for Wreck it Ralph?), gummy cherries (for the Pacman cherries), chocolate nonpareils, sugar-coated gummy fruit slices, tangy bananas, and some gummy circles (not quite Dots, but smaller, gummier versions).  I just wanted them to look very colorful, bright and fun!


This one has a heart, inspired by the medal Vanellope gives Ralph, with his bricks around it:


This one just makes me smile because it's so sugary and swirly:


This one has cherries like the ones Ralph takes from PacMan:


It goes on and on like this... Here I am with a very colorful one covered in "tangy bananas." 


Hopefully I've inspired you to make some of your own (or at least to eat some candy ;))!  If you love Disney, please stop by my Disney blog, Oh Boy, Mickey!  Go and see Wreck-it-Ralph, you're gonna love it!

Monday, October 29, 2012

Halloween (and Disney) Cupcakes!!

I'm never sure what kind of cupcakes to make for Halloween, but this year I ended up with spoooky red velvet :)  I was about to buy some red velvet cake mix (because when I decorate, I usually don't do the cake from scratch) but my dad pointed out this red velvet cupcake mix!  It also came with cream cheese frosting mix AND a pastry bag.  Fortunately, I'd just bought a coupler for my #6 star tip.  I'd used the tip for my rainbow cupcakes without the coupler, and this time it was much easier!


Well, I made the cupcakes with no problem:


Then I made the frosting.  It was enough for about 8 cupcakes of the 12, and that's without filling the center like the directions say.  I had to make my own and I couldn't find my Martha Stewart cupcake book!  I used some powdered sugar, butter and vanilla.  I dyed it the same orange shade as I'd dyed the first batch of frosting.  I was pretty pleased with myself! 


I had these adorable sugar ghosts holding candy corn from Party City:


 Here they are sitting pretty:


Here they are on the haunted house cupcake tower I bought last year, with some witch-finger pretzels:


Here's some favors I made after seeing them in last year's Taste of Home Halloween special:


Little cauldrons with bows and candy :)  I picked out the candy from Fuzziwigs at the mall.  Candy corn, pumpkins, and bones!  WoooOoOo!  Oh, and orange Kit Kats!


I also had these individually wrapped eyeball candy stirrers, and I bought some orange sanding sugar at AC Moore to rim the cups (just put some lime or lemon juice around the edge of the cup and dip it in a bowl of the sugar).  This drink is a Pumpkin Cream (2 parts cream, 1 part pumpkin spice liqueur), yum!


This was my costume, the Little Mermaid :) I made the costume, and I will have a separate post in my Disney blog all about it!!  I had a lot of help on the skirt from my brother-in-law, Hiro :)


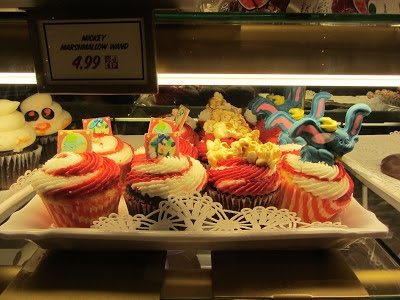
And speaking of Disney, I took some pics of great Disney Halloween cupcakes when I was there last week!  I only bought one:


Mmm a chocolate and buttercream cupcake with a mouse-ears chocolate pumpkin on top!  They also had ghosts with chocolate mouse ears:


I found a video on how the pastry chef at the Contemporary (Disney hotel) makes cupcakes with a cone tip like that, which I'm excited to try.  

There were Minnie cupcakes at most fast-food stops:


Looks delicious!  And the first open spot of New Fantasyland, Storybook Circus, has some circus-themed cupcakes:


And as one would expect at Disney World, everything is...


...made fresh with magic!!  Hope you have a magical Halloween!!

Monday, August 20, 2012

Rainbow Cupcakes!!

I read in a Betty Crocker's Best Recipes magazine about these "Tie-Dye Cupcakes" with this beautiful rainbow icing.  I read the instructions for the icing, but it sounded a little confusing, so I looked up a video that was VERY helpful and it is this one here


No, this isn't ice cream.  It's ice-ING!  Two can's worth.  Mmmm.  I think I'll just stop here and eat it.  End of post.

...Just kidding! So you separate two can's worth into three bowls and then dye them red, yellow and blue.


Mike said it looked like the food the lost boys eat in Hook.

So you get out your pastry bag and your #6 star tip (I had to go out and buy them) and turn the bag inside-out to start piling on the icing.


First you spoon on one color.  Then another on top.  Then another.  Not too bad!  Then you start squeezing it out on a plate or wherever until you see the first color mixing with the second.  Then put it on your cupcake!  I made funfetti cupcakes the night before.  That's an easy rainbow cupcake to make!  The Betty Crocker recipe called for tie-dyed cupcakes (different colored batter all piled onto each other) but I was much more interested in the frosting!


That was my first.  How PRETTY!  I absolutely loved doing these.


Just keep going till you run out.  I ran out after exactly 12 cupcakes.  I had more icing but the bag was getting heavy and I didn't know how much I should have started out with.  This is what the bag looked like when I'd squeezed it all out:


Oooh!  Starting to get a little brown.  But otherwise it looks like I'm working on a tie-dye shirt!


I used Disney Princess liners OF COURSE!  They were going-away cupcakes for my friend Monica who just left for college.  We have this common bond over Disney Princesses.  Of course my favorite, Ariel, wasn't even represented ON the wrappers...


 Hooray!  Well, there might not be an Ariel, but here's an aerial view! (ha ha)

 
This was my first time using a pastry bag and I LOVED it!  It was so easy and they look so cool.  I would definitely make these again!


Wednesday, June 27, 2012

you don't have to be Brave to eat cupcakes...

When I was a kid, there were chocolate bars of Pocahontas and The Lion King.  Now there are baby carrots and reusable green bags from Subway with Merida's face on them.  Green, healthy, BORING!  I want chocolate!!  So I took it upon myself to make Brave cupcakes.
Here I am happily mixing Merida's hair color:


I was worried about making Merida.  Her amazing hair was very hard to capture in frosting and candy.  I'm sure if I had a lot more time and a real frosting bag with interchangeable tips I could have made some squiggly, Chihuly-esque wonder in shades of red, yellow and orange.  But I was mixing colors in Dixie cups, and my most fancy piece of equipment is my offset spatula.  So I ended up with a girl in pigtails:


I tried using mini cupcakes in the gaps to make her hair bigger, but it just wasn't working.  The triplets were easier subjects!  The M&Ms looked just like curls, as I'd hoped.  But the pictures of them are with the bear cupcake and I'll be getting to that later.  In the meantime...
 
                                          
I made Merida's arrows out of thin pretzel sticks (the kind in individual snack boxes) and cut-up and shaped Starburst.  Red's my favorite, so it was hard to use these on cupcakes I wasn't eating (I ate the ones that broke.  And I ate one of the finished cupcakes later on :))  I cut the Starburst into little bowtie shapes (cut a triangle out of either side) and stuck the pretzels into the remaining triangles.  

I thought bullseyes were red, yellow, blue.  I watched a clip of Brave on YouTube to see how their bullseyes were.  Red, white, blue, white, black.  So that's what I did.  I got pretty frustrated cuz I wanted to use blue sanding sugar for the blue ring, but that was when I thought blue was the outer ring.  I was going to roll the sides in blue.  So I tried sticking blue on in little pinches in a circle.  It came out nice but frosting was easier.   So I made blue and put some of the sprinkles inside.


I did the old ziploc-frosting-bag trick I learned from Hello, Cupcake! a few years ago.  Fortunately I had red icing from an earlier project (Muppets).  I had chocolate frosting so I ziploc'd that too.  Ta-da:


Then I added the preztel arrows:


Arrowed!!  (that's a Teen Girl Squad reference for ya)


I was pretty proud of these!


After all this, the bears were much easier.   I frosted a chocolate cupcake and put on a few melting chocolates.  Then I put blue M&Ms on the melts with icing as glue for the eyes (it wasn't till I saw the movie that I realized the mother bear has brown eyes) and brown icing as the nose. 


And, even though this picture's darker, it had flash so it gives the little flecks of white like in normal cartoon eyes:


Oh how cute!  Haha.  I was actually going to make 3 of these as the 3 little bears but I ran out of chocolate melts.  I turned to the mini cupcakes I had standing by, and the chocolate morsels, and made these:


 3 actual little bears!  It was all so fun.  So here's one of the bears with the triplets:


 Yay!  So finally I frosted 2 cupcakes with vanilla and covered them in blue sprinkles and piped "be BRAVE" onto them:


So here they are all together:


Yay!  And here I am with them :)


Here's that bullseye with the sprinkles I was telling you about, on the top right corner:


I boxed some up for my friends Kim & Jeff since they were my double date to the movie.  I just adore these fold-up boxes I got from AC Moore.  I felt so professional!


The movie was great!  It's a real mother-daughter movie, which I wasn't aware of.  I would have seen it with my mom, otherwise!  But it was fun, and I suggest you stay till after the credits ;)